Capitol Reef with a new Fuji
There were three important goals for this Labor Day long weekend: switch to mirrorless, pick fruit, and get engaged. Not necessarily in that order.
I’ll make a long story short – she said yes! I’ll leave that story for myself, not this blog.

Let’s talk photography!
The first camera I realistically used was my mother’s Canon Digital Rebel XT. It got me through high school and my university photography course with an optically-stabilized walkaround 18-200mm zoom. I learned the fabled M mode. When I joined the Pixel Camera (well, Nexus Camera at the time) team, I picked up my own Nikon D3300 with a 35mm f/1.8 and added RAW and editing to my repertoire. Shortly after, I upgraded to a D7200. I’ve been wondering about something better ever since.
I tried a D500, but the extra – enormous – weight bought me zero image quality and just a handful frames per second (12 vs. 8). I never seriously considered full-frame, because for my purposes (hiking, wildlife, airshows) the weight and crop factor are indispensable. Plus, I’ve never seriously pushed the dynamic range of an APS-C sensor, especially not with even simple HDR technology in Lightroom and similar tools. I did need an electronic shutter (I can easily max my Nikon’s 1/8000 shutter and still have blurry airshow images.)
That put me in an odd world, where mirrorless crop-sensor was just what I needed. But who really makes that? There are cold Sony cameras with terrible ergonomics and controls, entry-level Nikon and Canon bodies with garbage lens selection (and Nikon has a long history of garbage APS-C lens collections), and … Fuji. With a range of sturdy bodies fitting any purpose, a complete selection of high-end lenses, a bent toward video valuable for me at work, and the other Fuji advantages: film simulations and classically-styled bodies. Fujis are cameras photographers lust after!
So naturally I’ve used Fujis now and again: an X-T2 for a trip to Europe, an X-T20 for a trip to Japan, and an X-T4 (Zion, Capitol Reef, and a couple hikes). OK, maybe that’s more than now and again. And once Lightroom updated to provide competitive demosaicing performance with other tools, it was time to make the switch permanent.
So I picked up a X-T4 and the 23mm f/2.0 and took it back to Capitol Reef determined to go back to a simpler time with just that classic 35mm-equivalent-field of view and some fun analog dials.

This image was taken just 2 minutes after sunrise on the Rim Overlook Trail, past the Hickman Bridge overlook, in total ~1.5 miles up the trail. We woke up at 5:45am in order to be on the trail by 6:15am to be here for sunrise, which meant doing the first 15 minutes of hiking by flashlight.
I did most of my shooting in Astia because Provia just looks too desaturated, but this image taught me the value of Velvia especially during golden hour. This image already had a muted, dark, grayish palette and Velvia gave it the life I experienced – dark but rich, with purple and gold.

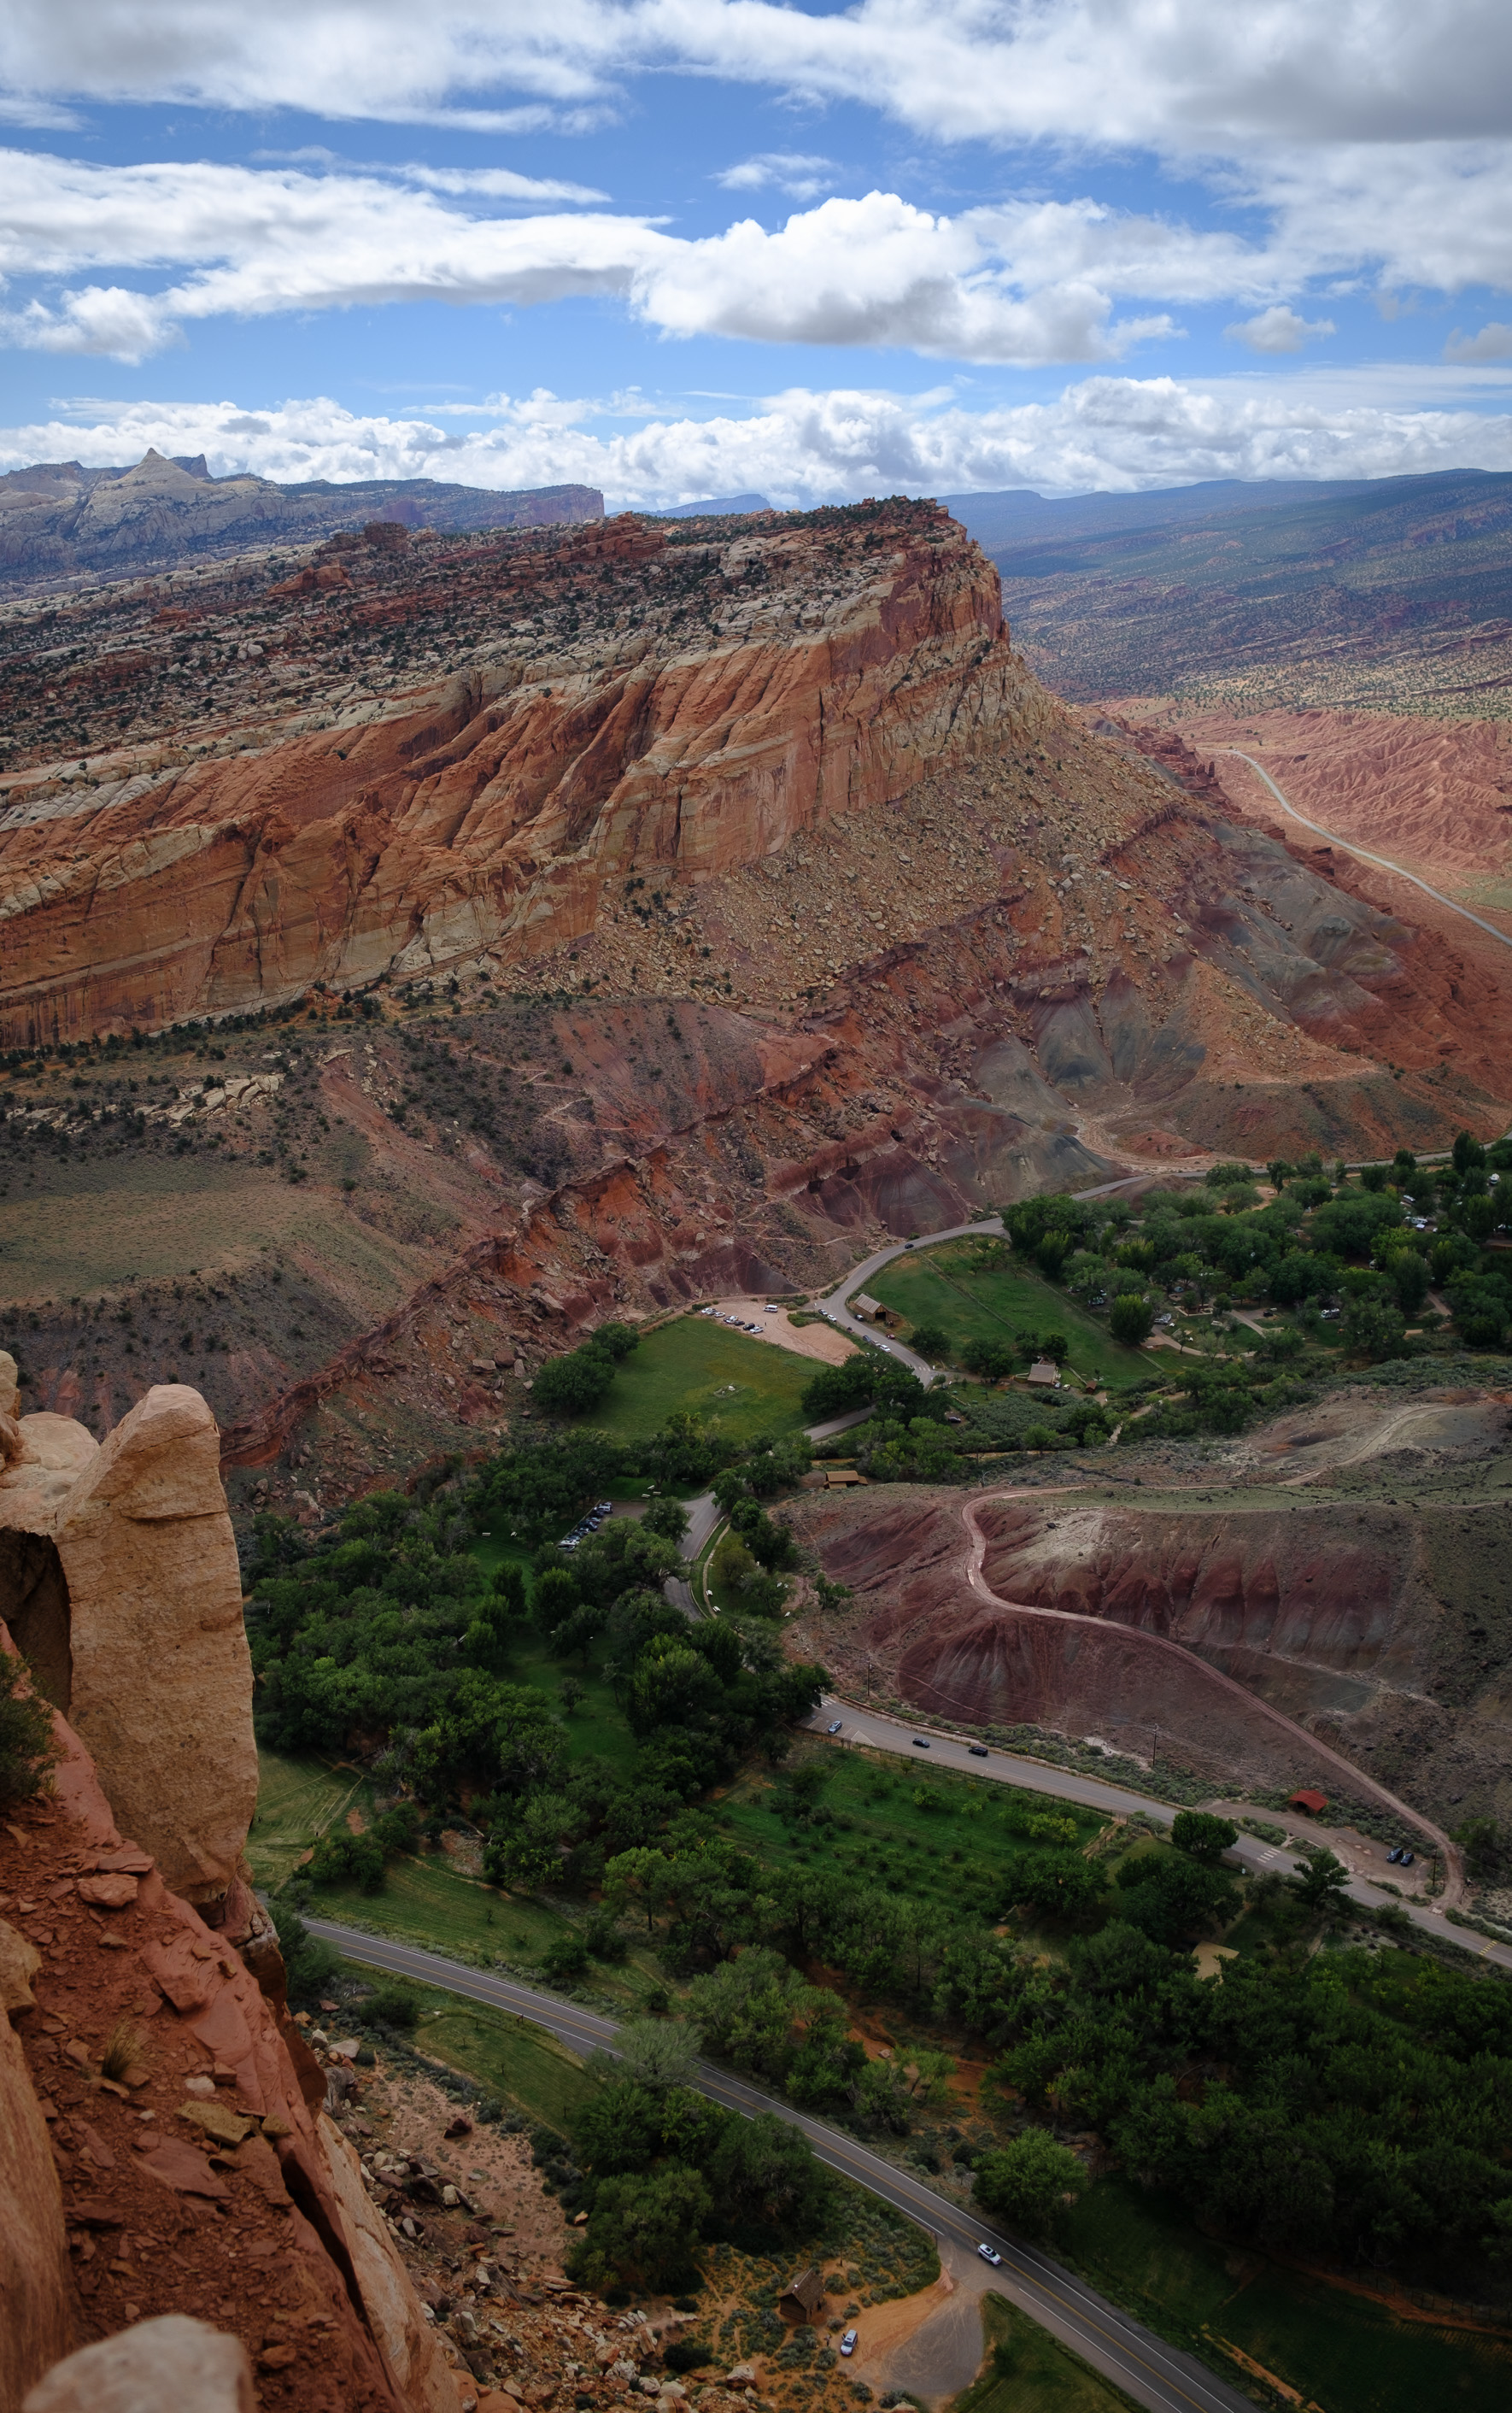
This was taken at Rim Overlook around 45 minutes later. Rim Overlook is easily one of my favorite places in the park because it’s easy to reach (just 5 miles round-trip) and from it you can see much of what defines Capitol Reef – the Waterpocket Fold and the orchards.
But I already have a favorite image from this vantage point featuring the orchard from a previous trip, and I found at sunrise the valley is too shadowed – and the rocky foreground too brightly-lit with warm light – to draw the eye where I want it. So I sought out a different foreground and avoided capturing the orchards. This incredibly-gritty, dried-out husk of a tree made the perfect one.
This image caught me by surprise because I’m more comfortable blowing out the sky with this camera than I ever was with my Nikon. Normally I start by dragging highlights down to put color in the sky, but here it just didn’t feel necessary. I haven’t placed my finger on why, but the Fuji seems more capable of preserving attractive skies when they’re blown out or nearly so.

On this trip, for the first time, I hiked past Rim Overlook and all the way to the Navajo Knobs. We arrived by 9am, well after golden hour but before everything looks quite so flat. The viewpoint was advertised as having 360-degree panoramic views of the entire park, and those claims were not exaggerated. I’ve never had a better view of the Waterpocket Fold’s jagged edges, like the teeth on a woodsaw.
Some surprises in this image: unlike the classic Grand Canyon horizontal layers, this area was uplifted so the layers end up oriented more vertically. As you look right right to left, not top to bottom, you see older and older rock formations.
This image looks best in Velvia, but I noticed an overpowering saturating and darkening effect on the greens that I had to correct with some lifted shadows and blacks and reduced green and yellow saturation. I found myself making the same adjustments for many Velvia images with well-lit greens. Overall I’m finding Fuji’s look to be more expertly processed – whereas the Nikon’s tone-mapping made every image look meh and needed basic global contrast adjustments, Fuji images need only more targeted “fixes” for particular artifacts.

This was taken well after sunrise (and after breakfast, even …) on the first day on the main road into the park from Torrey. This was the day we had an all-day flash flood warning, so we avoided the washes and canyons on this day of the trip and either stayed well above the valleys or close to the road while that lasted. The next day, after heavy rains in the late afternoon, you could see where water had run through the valley and washed soil over the road. Glad we were cautious!
This image took the most editing of any here. It’s a fairly boring composition, so it needed some spice. I threw it in the set because I needed some variety away from the southeast-facing views nearly all the other images in this set have. I had to pull out the normal techniques I learned on my Nikon like radial filters to control the vignette and highlight the subject, using the texture control to move the eye toward the subject, sky selection with contrast to add some drama to an otherwise-overcast sky, and so on. It’s a fine JPEG extracted from a mediocre RAW, but not incredibly memorable. I do like variety in my sets, though.
I took a better version of this image – another shot from the south side of the Rim Overlook – on my Nikon a couple years ago, but if this is my only post here on the park, it needs to be here. The orchards are the most immediately-memorable part of the park, because depending on when you visit you can pick fresh pears, apricots, cherries, peaches, or apples. On the last trip we caught peaches, apples, and pears, but this time we missed peaches by just a few days and caught just the other two. Next year we’ll need to come back for apricots and cherries for the first time, and peaches again!
Note that with the sun higher, the orchards are well-illuminated. I think this view would be excellent 2 hours before sunset, when the sun is just about to set in the valley. I’ll come back for that next time – I have yet to find an excellent sunset spot in the park yet, and I keep arriving as the last light is on the tips of the cliffs despite arriving an hour before sunset.
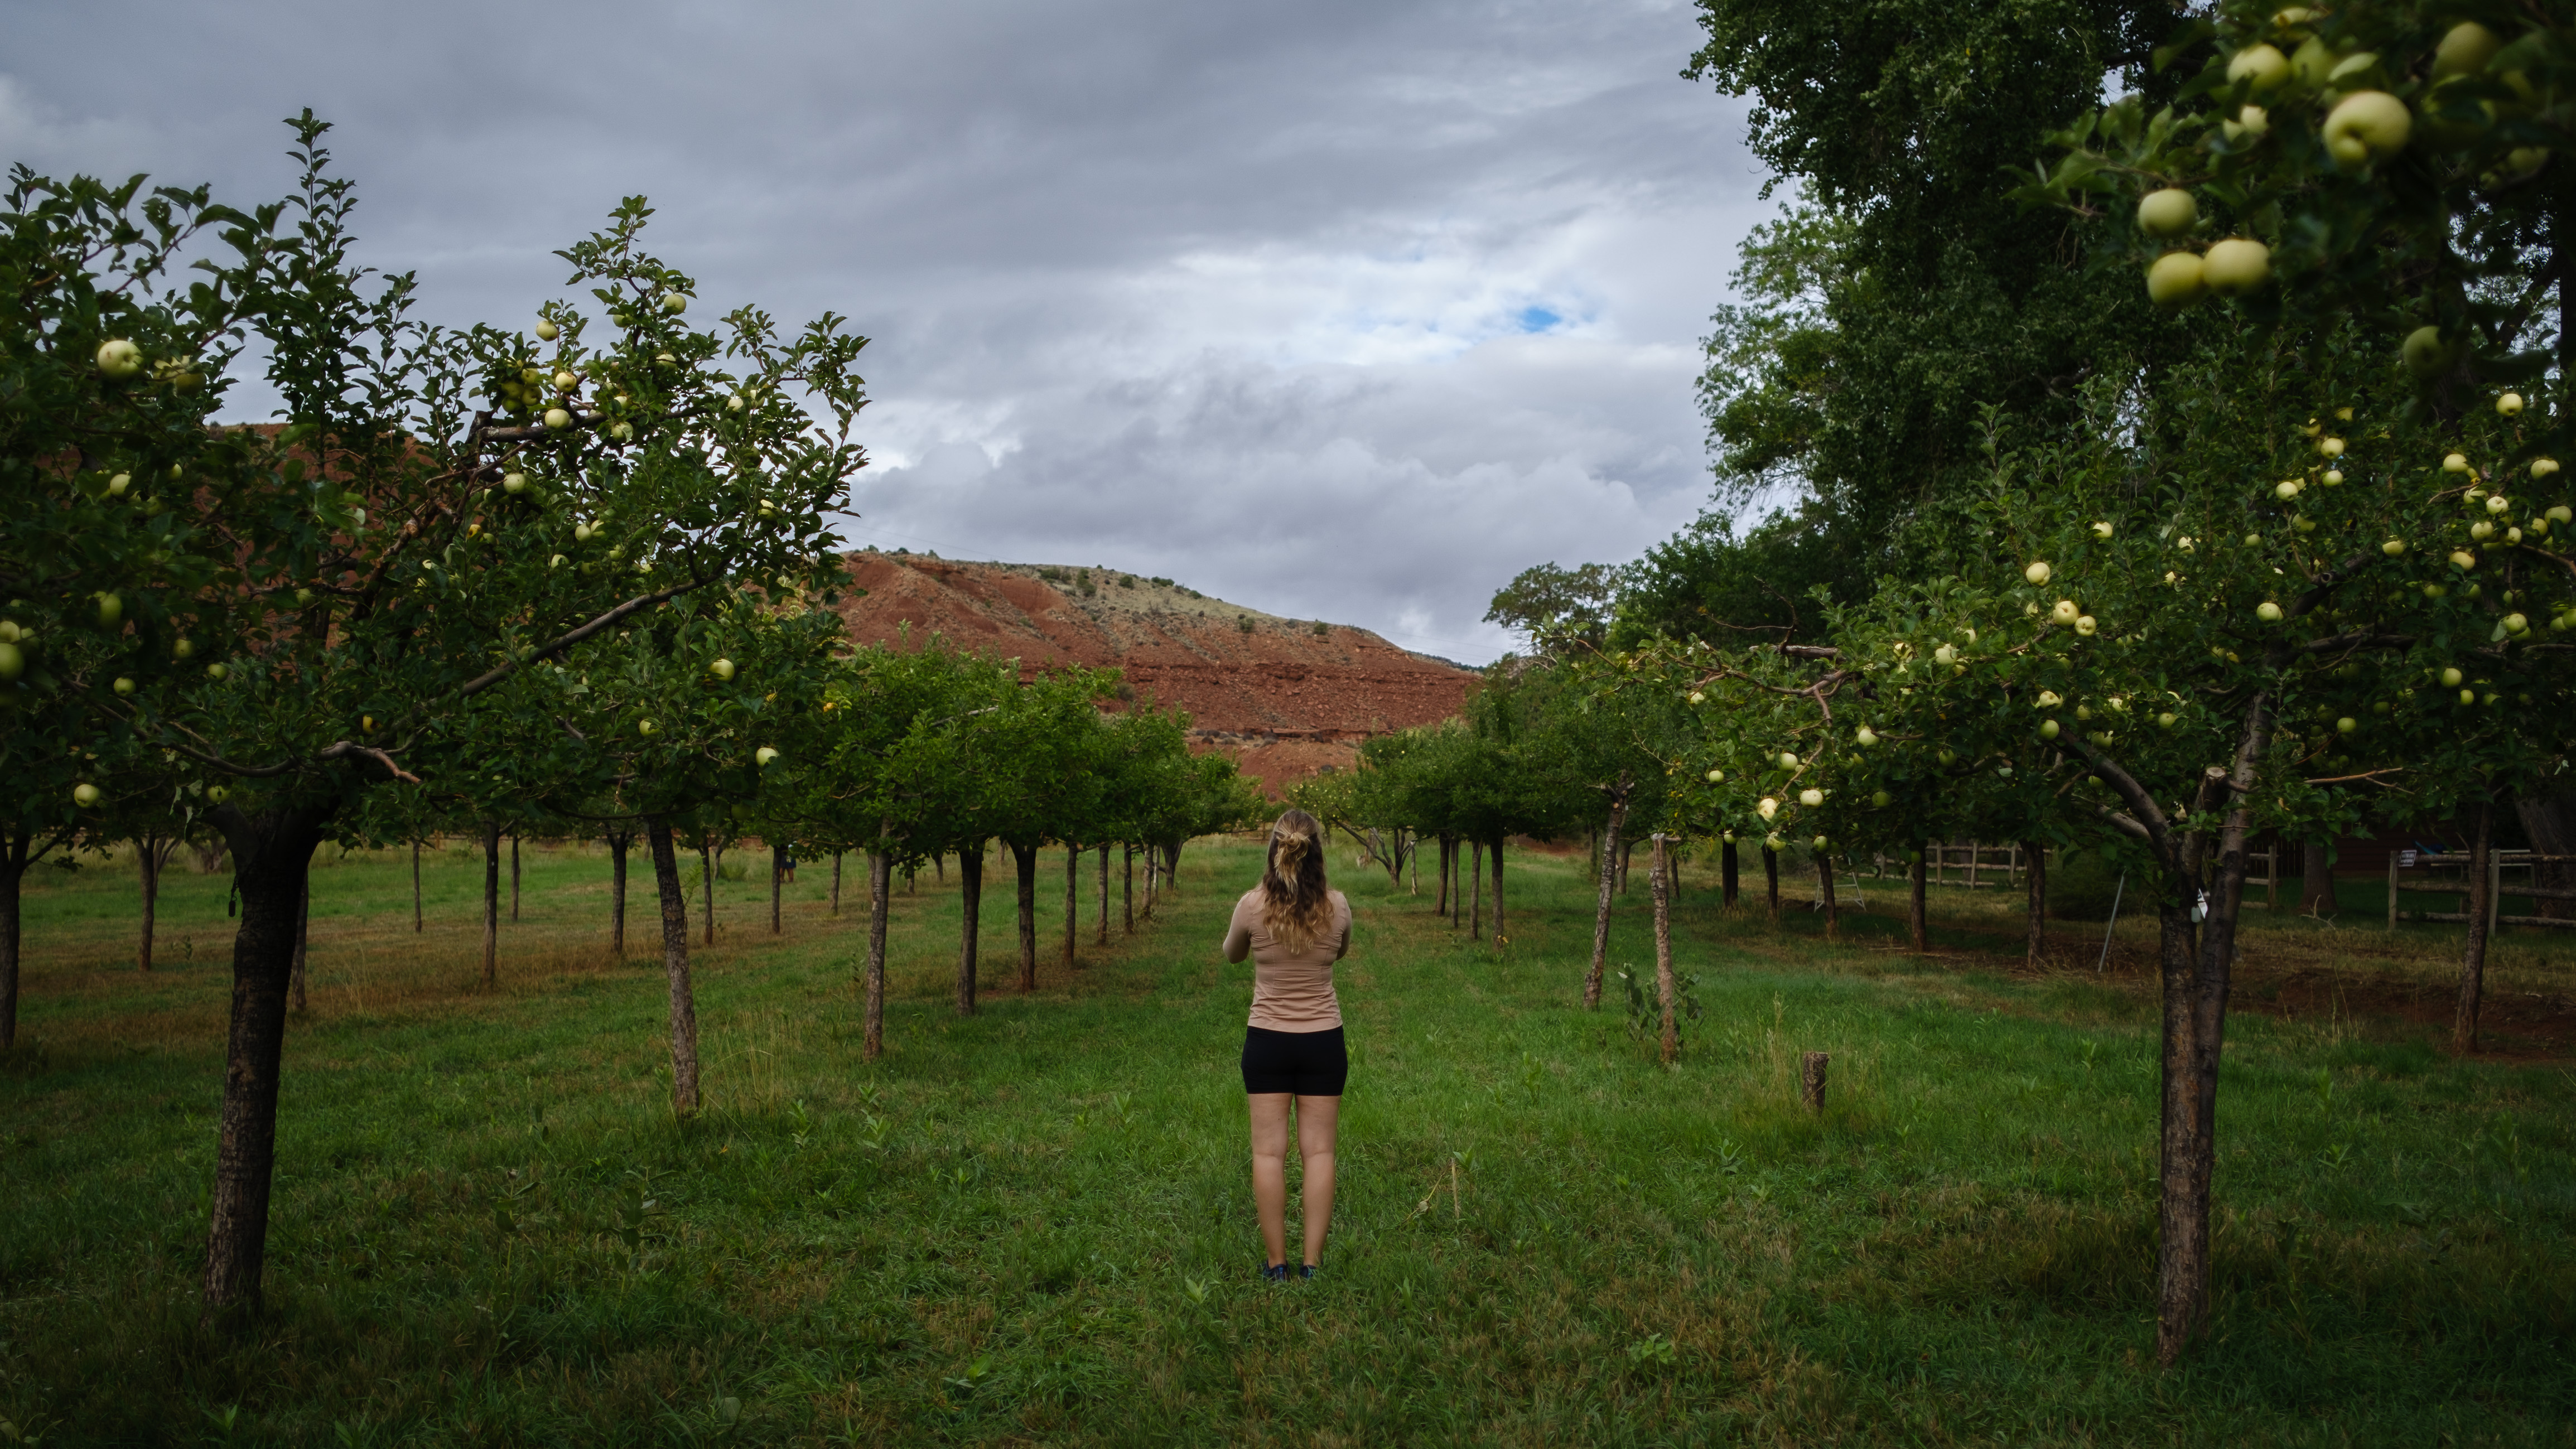
This final image was taken in the orchards properly, down in the valley, with the cliffs behind us. See how densely the apples grow on the tree! You can trivially walk out with dozens of pounds of fruit and barely make a dent, if that’s what you’re after.
This image is nearly unedited except for one unusual adjustment I find myself making on nearly all the images taken in the orchard. Regardless of the color of the fruit, but especially with green-apples-against-green-leaves, the fruit can be visually lost in the trees. I did a color-range selection on the apples and increased their luminance, then lowered global exposure otherwise, to help them stand out.
Overall, in terms of photography, this trip taught me:
- As always, the secret to great images is being in the right place at the right time, which overwhelmingly means waking up way too early and eating dinner way too early.
- Astia is truly the way to go by default. Velvia is excellent for sunrises, but you need to back off the greens when they’re well-lit. Provia – too bland – and the other looks – too stylized – never spoke to me.
- Fuji images truly need less editing than Nikon, so RAW is less necessary – but by no means is it unnecessary.
- Fuji RAWs have just as much shadow recovery available as my Nikon did. They might have less highlight recovery, or it’ might’ve been a side effect of continually shooting into the sun on this trip, so I need to experiment with setting -1/3 or -2/3 stop of EV.
- The ability to offload JPEGs wirelessly is nice, but not much easier (that is to say, hard and finicky) than just offloading via a USB reader. I will stick with only offloading the handful of files wirelessly I want to immediately share, rather than using it for backing up an entire card.
We’ll be back, Capitol Reef!